Inking and coloring artwork in Adobe Illustrator
When I first started doing the Once Upon a Sketch Screen Casts I created a series of two videos about how I ink and color my drawings in Adobe Illustrator. Well, it’s been over a year since I created this set of videos so I thought I would share them again for those who haven’t seen them yet and even if you have seen them you might like a refresher. I just watched these videos again and learned things from myself that I had forgotten (which is really funny).
Some might ask why you would want to create inked looking vector lines in Illustrator when you could use another tool like Photoshop, Sketchbook Pro or Manga studio to get the same look. My answer to them would be, even though the two lines might look the same on the surface they are two very different things. The main difference between the two would be that vector lines are infinitely scalable and raster images are not. Example, a company hired me to design mascots to promote one of their programs, I created these characters using the same techniques shown in these videos and most were created at around 8.5in x 11in. With these images being created in a vector format it was no problem when the company asked me to create a billboard using the same artwork with no loss in quality when the images were blown up to about 600 times the size that they were created at. This would not have been the case if the images were created in the other programs. Now that you know why you would want to create this type of drawing, here are the two videos. The first is how to create inked looking lines in Illustrator and the second is how I fill in those lines using the Live Paint Tool.
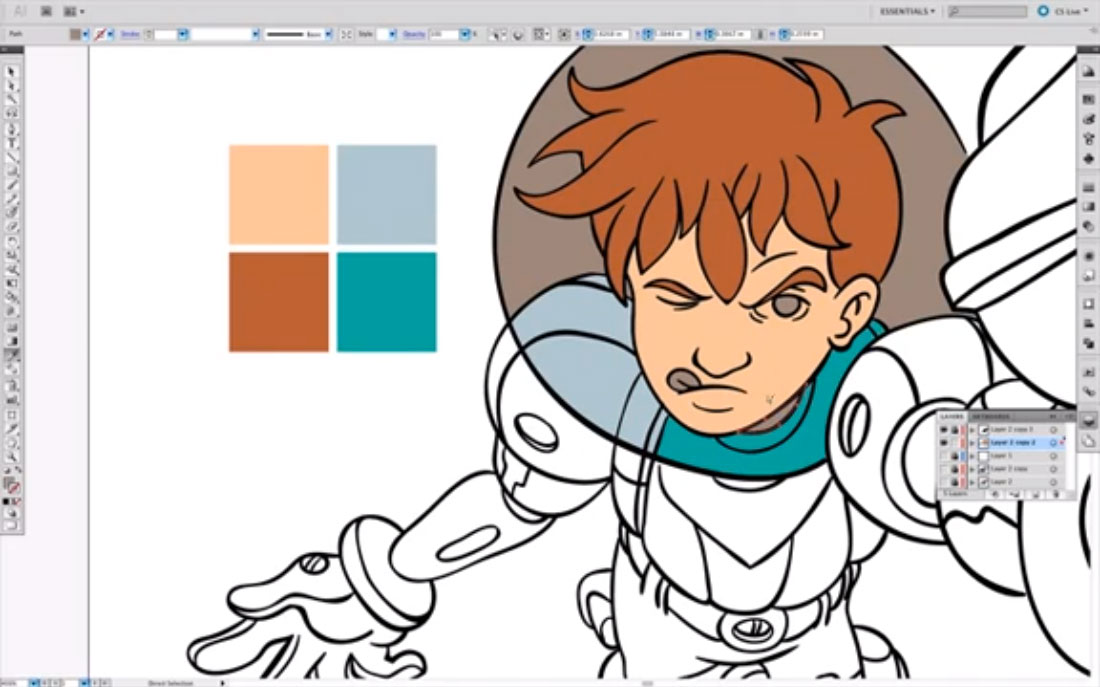
The first video is about how I set up my brush tools in illustrator to get and inked looking vector line. I also use the blob brush tool to show you how to create a different type of line and describe the difference between the two tools.
The final video in this two part series is about how to use the Live Paint tool to color in the lines that were created in part one.
I hope you enjoy the rerelease of these two videos. Please don’t judge my narration too harshly, it was my first try at screen casting. Even though my narration is it great I think the content is good. If there was something I missed in these two videos let me know in the comments.
Norm
Growing up on the shores of Maui, Hawaii, Norm has always loved drawing. Since leaving the islands’ beautiful beaches and landing in Oregon, he went to college and received a degree in graphic design as well as an additional degree in digital prepress technology. After graduating, he worked for an interactive media firm in Corvallis, Oregon. While there, he was the company’s lead illustrator/designer and was responsible for creating illustrations, animations, and interactive products like video games. Now living in Beaverton, Oregon, Norm worked as an in-house illustrator for 10 years at a large education company in downtown Portland, Oregon. While at this position, he was the creative mind behind nationally marketed campaigns, numerous brand identities, toy and product designs, children’s books, as well as Web and interactive designs for the company’s design team. After leaving this position to raise his son, he now spends countless hours perfecting his craft as a freelance illustrator. He has worked with companies like Highlights Magazine, Houghton Mifflin Harcourt, Reading A to Z, Kaiser Permanente, KinderCare, and the Oregon Museum of Science and Industry (OMSI). He has created projects such as marketing illustrations, children’s books, coloring and activity books, video games, and educational products for these companies and others. Norm’s ability to draw has given him the chance to do the thing he truly loves: Create.

Leave a comment